
Got A Leaky Faucet? 5 Reasons Why And How To Fix It Yourself
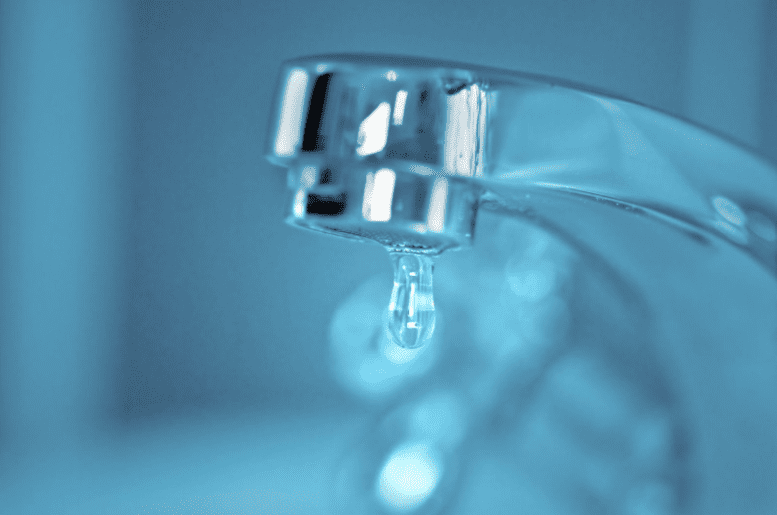
Has that persistent “drip, drip, drip” from a dripping faucet got you teetering on the brink of madness? Dripping faucets are not only annoying, but they can also be a sign of something more serious. Here are five possible causes of your leaky faucet and how to fix it yourself.
What Are the Common Causes of a Dripping Faucet?
A dripping faucet can be a persistent annoyance, but understanding its common causes is the key to regaining control. Often, the culprit lies in worn-out washers or seals, those small yet vital components that endure constant use. These wear down over time, allowing water to seep through and manifest as that familiar drip.
In addition to washers and seals, the O-ring, another diminutive yet significant part, can be a source of trouble. If loose or damaged, this tiny ring fails to maintain a watertight seal, contributing to the nagging leaks. Going deeper, the corrosion of valve seats, and the often-overlooked connectors between the faucet and spout, can lead to insidious leaks that may go unnoticed until damage becomes evident.
Sometimes, it’s not the faucet components at fault but the water pressure. Excessive water pressure, beyond the recommended range, can cause faucets to drip intermittently or persistently. Understanding and addressing this pressure imbalance can significantly contribute to resolving the issue.
Lastly, loose or broken parts within the faucet assembly can disrupt its functionality, causing instability and leaks. Tightening or replacing these components is crucial in restoring your faucet’s integrity. By identifying these common causes, you empower yourself to navigate the path to a drip-free faucet with confidence.
How Serious is a Dripping Faucet?
While a dripping faucet might seem like a minor inconvenience, its consequences can extend beyond mere annoyance. One of the most immediate concerns is the wastage of water—every droplet counts, and those seemingly harmless drips accumulate over time, contributing to a significant loss. In fact, a single leaky faucet can waste anywhere from three to 30 gallons of water daily, impacting both the environment and your utility bills.
Beyond the financial and environmental implications, persistent leaks can lead to more serious issues within your home. Continuous exposure to moisture can foster the growth of mold, potentially causing health problems and compromising the structural integrity of your surroundings. Additionally, water stains and damage to fixtures and surfaces may occur, diminishing the aesthetic appeal of your living spaces.
Moreover, the constant dripping can escalate into a larger plumbing problem if left unaddressed. Over time, it may contribute to the deterioration of faucet components, requiring more extensive repairs or even a complete replacement. The longer you ignore a dripping faucet, the more profound its impact becomes. Therefore, taking prompt action not only conserves water and saves on bills but also safeguards your home from potential complications down the line.
Common Faucet Types
Cartridge Faucets
Cartridge faucets are like the superheroes of the faucet world. They come in both single-handle and double-handle varieties. The magic lies in the cartridge—a cylindrical piece that controls water flow. They’re reliable and often easy to repair. If you’re into simplicity and durability, cartridge faucets are your go-to.
Disc Faucets
Meet the disc faucet, a modern wonder. They use a pair of ceramic discs to regulate water flow and temperature. Smooth and precise, these discs move gracefully, offering a level of control that’s hard to beat. Disc faucets are not only efficient but also tend to be low-maintenance. If you’re a fan of sleek design and efficiency, disc faucets might be your style.
Ball Faucets
Ball faucets are the acrobats of the faucet family, often found in kitchens. They use a ball bearing to control water flow and temperature. The single handle attached to that ball allows for a wide range of motion. While they provide excellent control, their design complexity might mean more opportunities for issues. If you like a faucet with a bit of flair and flexibility, the ball faucet could be your pick.
Compression Washer Faucets
Old school charm? That’s the compression washer faucet. Traditional and reliable, these faucets use a rubber washer to control water flow. Turning the handle compresses the washer, stopping the water. While they’re classic, they’re also more prone to leaks over time. If you appreciate the classics and don’t mind a bit of DIY maintenance, a compression washer faucet might be your style.
Understanding these faucet types is like having a toolkit for your plumbing adventures. It helps you troubleshoot issues and pick the right faucet for your needs.
How Do I Stop My Faucet from Dripping?
Dealing with a dripping faucet doesn’t have to be a daunting task. In fact, with a few simple steps, you can often fix the issue yourself. Here’s a straightforward guide:
1. Shut Off the Water: Before you start, turn off the water supply to the sink. Locate the individual shut-off valves under the sink—one for hot and one for cold. If these valves aren’t present, you may need to shut off the main water supply for the entire house.
2. Prepare the Workspace: Cover the sink drain with a plug or a towel to prevent small parts from falling down the drain. This ensures that you won’t lose anything important while working.
3. Remove the Faucet Handle: Depending on your faucet type, find and remove the handle. This could involve unscrewing a set screw behind the handle or prying off a top screw cover and loosening the screw underneath. Take your time to do this carefully.
4. Access the Cartridge or Stem: After removing the handle, you’ll find the cartridge or stem, the culprit behind the dripping. Use a wrench to loosen the packing nut in the handle assembly and then gently pull the part straight up and out.
5. Identify and Replace the Problematic Part: Inspect the cartridge or stem for any visible damage. If you notice worn-out washers, O-rings, or seals, replace them with new ones. Make sure to bring the old parts to the store to ensure you purchase the right replacements.
6. Clean and Reassemble: Clean the area around the handle and all parts thoroughly. If you’ve replaced any parts, insert the new cartridge or stem, ensuring proper alignment. Reattach the faucet handle securely.
7. Turn On the Water: Once everything is back in place, turn the water supply back on. Run both hot and cold water through the faucet for a few minutes to ensure everything is working correctly.
By following these simple steps, you can often save yourself from the annoyance of a dripping faucet and the potential issues it might cause in the long run.
DIY Plumbing Safety Tips
1. Locate the Main Shutoff Valve: Before you even think about grabbing a wrench, locate and shut off the water supply. You don’t want an unexpected shower while fixing that leaky pipe. The main shut-off valve is usually near the water meter or where the main line enters your home. Twist it clockwise, and you’re in control.
2. Gather the Right Tools: Having the right tools is like having a superhero utility belt. Wrenches, pliers, pipe cutters—equip yourself properly. Using the correct tools not only makes the job easier but also safer. Don’t go MacGyver on your plumbing—leave the paperclips and chewing gum to the movies.
3. Know Your Limits: DIY is awesome, but it’s crucial to recognize when to call in the professionals. If your plumbing project starts feeling like a scene from a disaster movie, it’s time to dial that plumber’s number. Some things are best left to the experts, and there’s no shame in that.
4. Protect Yourself: No superhero heads into battle without armor. Similarly, you shouldn’t tackle plumbing without protection. Safety glasses are your sidekick against unexpected splashes. Gloves shield your hands from sharp edges and nasty surprises. It’s not just about fixing pipes; it’s about keeping yourself intact.
5. Take It Slow: Rome wasn’t built in a day, and neither should your plumbing repairs. Rushing can lead to mistakes and, more importantly, accidents. Take your time, follow the steps carefully, and don’t skip any. A slow and steady approach wins the DIY plumbing race.
6. Ventilate the Area: Some plumbing tasks involve substances with less-than-pleasant odors. Ventilate the area well to avoid inhaling anything harmful. Open the windows, use fans—whatever it takes to keep the air fresh. Your nose will thank you.
Remember, safety isn’t just a suggestion; it’s the golden rule of DIY plumbing. Follow these tips, and you’ll be the DIY plumbing superhero in your home.
If you don’t feel that you’re making any headway, don’t hesitate to ask for help. If you need assistance with a leaky faucet, Always Plumbing and Heating LTD offers a wide range of services, including plumbing repair, maintenance, and new installations. Our team of trained professionals can help you with any plumbing issue you may have. Contact us to schedule an appointment or to learn more about our services.